Noise Zone
Noise zones are created via an analysis procedure. They allow to determine a noise print in relation with the center of the zone. This section shows how to create, use, import and export noise zones as analysis files.
Creating a Noise Zone
Note that noise zones can only be created one by one. |
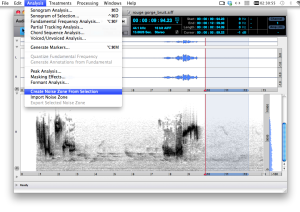
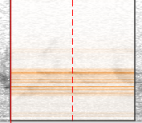 | The noise zone is represented in the sonogram window and processing sequencer. It actually determines the characteristics of a noise print, which is located in the middle of the zone, as indicated by the red dashed line. This is why a noise zone cannot be moved or resized. |
No matter how large a noise zone is, the analysis will apply to the whole sound or to a selected region, during the noise removal. The representation is ambiguous though, since it is shown in the processing sequencer with a duration.
Noise Zone Analysis Parameters
 | The quality of the noise zone analysis only depends on the FFT real time processing settings. To set the parameters, select the |
These parameters are the same as the FFT parameters that will be applied during the noise removal, but they can be defined independently.
Noise Zone Application Area
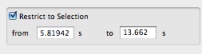 | During the noise removal, the noise print is applied to the whole file, if no region is selected. The noise removal can be applied to a selected region of the file, with the |
This is true no matter how many noise zones have been created, and wherever the noise zone(s) is/are located.
All noise zones are taken into account from the first to the last. Noise zones cannot be selected.
- Introduction
- About this Document
- Introduction
- Installation
- Going Through an AS Session
- The AudioSculpt Environment
- Signal Representation
- Signal Analysis
- Modeling Sounds with Sinusoids
- Signal Manipulation
- Managing Treatments
- Processing Sequencer
- Advanced Use
- Errors and Problems
- Basic Analysis/Synthesis Notions
