Noise Zones Export and Import
Noise zones can be exported as analysis files and imported in any sound file subsequently.
Saving and Importing Noise Zones
Noise zones can be exported in any location of your computer. Note that they can only be exported one by one.
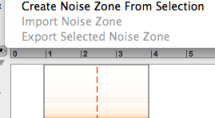
Select a noise zone with a click in the sonogram or processing sequencer.
Choose
Analysis/Export Selected Noise Zone.Choose a file name and location – there is no dedicated default folder for noise zones.
The resulting file will be stored as a -noisezone.sdif file.

The analysis parameters of imported noise print cannot be modified. Hence, they cannot be interpolated with other existing prints. This implies a number of restrictions.
Only one noise zone can be imported in a sound file. To assign a noise zone to a specific region, select it in the waveform window. If no region is selected, the noise zone will be applied to the whole file. This feature also allows to interpolate a noise zone from another file with noise zones created in a current file. | 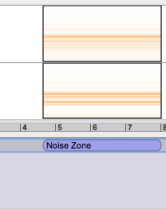 |
 | In order to preserve the coherence of the FFT settings of each noise zone : only one noise zone can be imported in a file. An imported noise zone cannot coexist with other noise zones. Consequently, if a noise zone is created in a file, the noise zone import is disactivated in the |
If a noise zone was imported before the creation of a new noise zone, it is canceled by the creation of a new noise zone. It is represented with dashes in the processing sequencer, and disappears from the sonogram window. The inspector will refer to it as an inactive zone. |
- Introduction
- About this Document
- Introduction
- Installation
- Going Through an AS Session
- The AudioSculpt Environment
- Signal Representation
- Signal Analysis
- Modeling Sounds with Sinusoids
- Signal Manipulation
- Normalization, Noise, Gain
- Noise Removal
- Noise Zone
- Manipulating Noise Zones
- Noise Zones Export and Import
- Noise Zones Interpolation
- Processing Noise Removal
- Gain Envelope
- Pitch and Spectral Envelope Modifications
- BPFs Manipulations – General Guidelines
- Spectral Clipping
- Dynamic Filtering
- Surface Filters
- Spectrum Manipulation and Treatments
- Processing Parameters
- Managing Treatments
- Processing Sequencer
- Advanced Use
- Errors and Problems
- Basic Analysis/Synthesis Notions
